Installing Gentoo on DL380 G8 BIOS-LVM-LUKS
This set of notes track the steps I followed to install Gentoo Linux on an HP DL380 G8 server. The goal is is simply to get a bare system up and running on the hardware with encrypted LVM, booted from BIOS. Updates and configuring for use come later, perhaps in another post.
Starting Point
The server is powered on, and has booted from the latest Gentoo Minimal Installation CD ISO, downloaded from here and written to a USB thumb drive. At the server console I took the following actions:
- Set root password using passwd command.
- Ran net-setup and set one of the NICs to get an address automatically via DHCP.
- Started SSH by issuing
/etc/init.d/sshd startcommand.
After doing the above, all of the steps that follow below were done through an SSH session to the server from my workstation, at the point in the Gentoo Handbook equivalent to the “Preparing the Disks”.
Preparing Disk and File Systems
So this will be a BIOS boot build with the simple partitioning scheme outlined in the table below.
| Partition | Filesystem | Size | Description |
|---|---|---|---|
| dev/sda1 | (none) | 2MB | BIOS/Grub Boot |
| /dev/sda2 | ext4 | 512MB | /boot |
| /dev/sda3 | LUKS+LVM | Rest of the disk | LVM Volumes |
Partitioning
Always make sure you are working against the correct storage device. I am using the lsblk command below to confirm the storage in the server I want to install Gentoo onto is actually recognized as /dev/sda, and it is. Device dev/sdb is the USB thumb drive with livecd image I used to boot the server.
livecd ~ # lsblk
NAME   MAJ:MIN RM   SIZE RO TYPE MOUNTPOINT
loop0    7:0    0 379.4M  1 loop /mnt/livecd
sda      8:0    0 838.1G  0 disk
sdb      8:16   1   7.5G  0 disk
├─sdb1   8:17   1   417M  0 part /mnt/cdrom
└─sdb2   8:18   1   6.4M  0 part
livecd ~ #
Some math is required to identify the optimal partition alignment. We will take the disk’s optimal_io_size, add the alignment_offset if any, and divide the total by the physical_block_size to get the sector we should start partitioning at. The Gentoo live CD environment conveniently has bc available for doing the calculation and the solution for me was to start at sector 1536. Them math helped me avoid parted giving me Warning: The resulting partition is not properly aligned for best performance. messages.
livecd ~ # cat /sys/block/sda/queue/optimal_io_size
786432
livecd ~ # cat /sys/block/sdb/alignment_offset
0
livecd ~ # cat /sys/block/sdb/queue/physical_block_size
512
livecd ~ # bc
bc 1.07.1
Copyright 1991-1994, 1997, 1998, 2000, 2004, 2006, 2008, 2012-2017 Free Software Foundation, Inc.
This is free software with ABSOLUTELY NO WARRANTY.
For details type `warranty'.
(786432+0)/512
1536
quit
livecd ~ #
This is where the actual changes are made to the disk and from which point. The below is what worked for me, your mileage may vary. The important part is to get the disk partitioned in the way that you want.
# parted -a optimal /dev/sda
GNU Parted 3.3
Using /dev/sda
Welcome to GNU Parted! Type 'help' to view a list of commands.
(parted) mklabel gpt
Warning: The existing disk label on /dev/sda will be destroyed and all data on this disk will
be lost. Do you want to continue?
Yes/No? yes
(parted) mkpart primary 1536s 3MiB
(parted) name 1 biosboot
(parted) set 1 bios_grub on
(parted) print
Model: HP LOGICAL VOLUME (scsi)
Disk /dev/sda: 900GB
Sector size (logical/physical): 512B/512B
Partition Table: gpt
Disk Flags:

Number  Start  End     Size    File system  Name      Flags
 1      786kB  3146kB  2359kB               biosboot  bios_grub

(parted) mkpart primary 3146kB 512M
(parted) name 2 boot
(parted) set 2 boot on
(parted) print
Model: HP LOGICAL VOLUME (scsi)
Disk /dev/sda: 900GB
Sector size (logical/physical): 512B/512B
Partition Table: gpt
Disk Flags:

Number  Start   End     Size    File system  Name      Flags
 1      786kB   3146kB  2359kB               biosboot  bios_grub
 2      3146kB  512MB   509MB                boot      boot, esp

(parted) mkpart primary  512M 100%
(parted) name 3 data-encrypted
(parted) set 3 lvm on
(parted) print
Model: HP LOGICAL VOLUME (scsi)
Disk /dev/sda: 900GB
Sector size (logical/physical): 512B/512B
Partition Table: gpt
Disk Flags:

Number  Start   End     Size    File system  Name            Flags
 1      786kB   3146kB  2359kB               biosboot        bios_grub
 2      3146kB  512MB   509MB                boot            boot, esp
 3      512MB   900GB   899GB                data-encrypted  lvm

(parted) quit
Information: You may need to update /etc/fstab.

livecd ~ #
One last check before moving on.
livecd ~ # lsblk
NAME   MAJ:MIN RM   SIZE RO TYPE MOUNTPOINT
loop0    7:0    0 379.4M  1 loop /mnt/livecd
sda      8:0    0 838.1G  0 disk
├─sda1   8:1    0   2.3M  0 part
├─sda2   8:2    0 485.3M  0 part
└─sda3   8:3    0 837.6G  0 part
sdb      8:16   1   7.5G  0 disk
├─sdb1   8:17   1   417M  0 part /mnt/cdrom
└─sdb2   8:18   1   6.4M  0 part
livecd ~ #
Data Partition Encryption (sda3)
Here I use cryptsetup to create a LUKS encrypted partition on my data partition dev/sda3. Eventually I plan to use a key file stored externally to the server to decrypt the luks partition. Doing that will require a customized initramfs which will not be covered in these notes, so I will also add a pass phrase to unlock LUKS in addition to the key file.
Create Key File
I use dd to write random data to the key file. The usual warning applies, always be extremely cautions when using dd, mistakes can result in data loss. It is a powerful tool and you own the responsibility or using it, whether the outcome is good or ill.
dd if=/dev/urandom of=enc.key bs=1 count=4096Create Encrypted Partition Using Key File
cryptsetup luksFormat -v -s 512 /dev/sda3 enc.key
WARNING: Device /dev/sda3 already contains a 'crypto_LUKS' superblock signature.

WARNING!
========
This will overwrite data on /dev/sda3 irrevocably.

Are you sure? (Type 'yes' in capital letters): YES
Existing 'crypto_LUKS' superblock signature (offset: 0 bytes) on device /dev/sda3 will be wiped.
Existing 'crypto_LUKS' superblock signature (offset: 16384 bytes) on device /dev/sda3 will be wiped.
Key slot 0 created.
Command successful.
livecd ~ #
Add Pass Phrase
By default, the genkernel tool used below to build the initramfs for the server expects to decrypt the server’s LUKS partition using a pass phrase it prompts for during boot. It is important to add a pass phrase to unlock the LUKS partition as it will be a default requirement until the initramfs is customized. It can be removed at a later time if desired.
livecd ~ # cryptsetup luksAddKey -d enc.key /dev/sda3

Enter new passphrase for key slot: ...
Verify passphrase: ...
Make Encrypted Partition Available as /dev/mapper/lvm
Being able to open the LUKS partition is an important milestone, things are going well so far when this works.
livecd ~ # cryptsetup -v luksOpen -d enc.key /dev/sda3 lvm
Key slot 0 unlocked.
Command successful.
livecd ~ #
Backup LUKS Header
Having a backup will be the only chance of restoring access to the LUKS partition in the event of corruption.
cryptsetup luksHeaderBackup /dev/sda3 --header-backup-file luks-header.imgCopy enc.key and luks-header.img to Another Device
It is critical that you copy the enc.key file to an external device before rebooting the system as it will be lost on reboot with all other file system changes in the live CD environment. It mad sens to me that I should copy the LUKS header backup off at the same time.
I used scp to copy the files from the server to the workstation I am building the server from, but there are other methods to stash the files as well. What is important is only that the files are copied to some persistent storage outside of the server itself.
Setup LVM Within Encrypted Partition
Standard LVM commands are used to set up the logical volumes within the LUKS partition as follows.
Physical Volume
livecd ~ # pvcreate /dev/mapper/lvm
  WARNING: Failed to connect to lvmetad. Falling back to device scanning.
  Physical volume "/dev/mapper/lvm" successfully created.
livecd ~ #
Volume Group
The volume group name I chose to use is vg0.
livecd ~ # vgcreate vg0 /dev/mapper/lvm
  WARNING: Failed to connect to lvmetad. Falling back to device scanning.
  Volume group "vg0" successfully created
livecd ~ #
Logical Volume
I created a swap partition, and a root partition using the lvcreate commands below.
livecd ~ # lvcreate -L 45GiB -n swap vg0
  WARNING: Failed to connect to lvmetad. Falling back to device scanning.
  Logical volume "swap" created.
livecd ~ #
livecd ~ # lvcreate -l 100%VG -n root vg0
  WARNING: Failed to connect to lvmetad. Falling back to device scanning.
  Reducing 100%VG to remaining free space 792.60 GiB in VG.
  Logical volume "root" created.
livecd ~ #
Make File Systems
Below I format and apply file systems as indicated in the following table.
| Partition | File System | Notes |
|---|---|---|
| /dev/dsa1 | none | BIOS/GRUB |
| /dev/sda2 | ext4 | boot |
| /dev/mapper/vg0-swap | swp | swap |
| /dev/mapper/vg0-root | xfs | root |
Boot Partition /dev/sda2
livecd ~ # mkfs.ext4 -L boot /dev/sda2
mke2fs 1.45.6 (20-Mar-2020)
Creating filesystem with 496896 1k blocks and 124440 inodes
Filesystem UUID: 5a8fc2bd-7a73-498d-bc38-97004e37bf5a
Superblock backups stored on blocks:
	8193, 24577, 40961, 57345, 73729, 204801, 221185, 401409

Allocating group tables: done
Writing inode tables: done
Creating journal (8192 blocks): done
Writing superblocks and filesystem accounting information: done

livecd ~ #
Swap Partition vg0-swap
livecd ~ # mkswap /dev/mapper/vg0-swap
Setting up swapspace version 1, size = 45 GiB (48318377984 bytes)
no label, UUID=44755b46-c220-42f5-bfab-51709ca1e6b8
livecd ~ #
Root Partition vg0-root
livecd ~ # mkfs.xfs -L root /dev/mapper/vg0-root
meta-data=/dev/mapper/vg0-root   isize=512    agcount=32, agsize=6492992 blks
         =                       sectsz=512   attr=2, projid32bit=1
         =                       crc=1        finobt=1, sparse=1, rmapbt=0
         =                       reflink=1    bigtime=0
data     =                       bsize=4096   blocks=207775744, imaxpct=25
         =                       sunit=64     swidth=192 blks
naming   =version 2              bsize=4096   ascii-ci=0, ftype=1
log      =internal log           bsize=4096   blocks=101504, version=2
         =                       sectsz=512   sunit=64 blks, lazy-count=1
realtime =none                   extsz=4096   blocks=0, rtextents=0
livecd ~ #
Mount File Systems
The first step into entering the environment which ultimately be the server setup I am building is to mount the eventual root file system at /mnt/gentoo.
Mount root Partition to /mnt/gentoo
livecd ~ # mount /dev/mapper/vg0-root /mnt/gentoo/Activate swap Partition
Next I activate the swap partition so it can be used.
livecd ~ # swapon /dev/mapper/vg0-swap
livecd ~ #
Base System Install
Set Time on Server
Starting out with accurate time will always make an install go smoother. The ntpd time server is used for this as below, but you could also set using date command and likely other methods.
livecd ~ # ntpd -qg
 6 Feb 20:48:36 ntpd[17862]: ntpd 4.2.8p15@1.3728-o Tue Dec 22 10:13:28 UTC 2020 (1): Starting
 6 Feb 20:48:36 ntpd[17862]: Command line: ntpd -qg
 6 Feb 20:48:36 ntpd[17862]: ----------------------------------------------------
 6 Feb 20:48:36 ntpd[17862]: ntp-4 is maintained by Network Time Foundation,
 6 Feb 20:48:36 ntpd[17862]: Inc. (NTF), a non-profit 501(c)(3) public-benefit
 6 Feb 20:48:36 ntpd[17862]: corporation.  Support and training for ntp-4 are
 6 Feb 20:48:36 ntpd[17862]: available at https://www.nwtime.org/support
 6 Feb 20:48:36 ntpd[17862]: ----------------------------------------------------
 6 Feb 20:48:36 ntpd[17862]: proto: precision = 0.067 usec (-24)
 6 Feb 20:48:36 ntpd[17862]: basedate set to 2020-12-10
 6 Feb 20:48:36 ntpd[17862]: gps base set to 2020-12-13 (week 2136)
 6 Feb 20:48:36 ntpd[17862]: Listen and drop on 0 v6wildcard [::]:123
 6 Feb 20:48:36 ntpd[17862]: Listen and drop on 1 v4wildcard 0.0.0.0:123
 6 Feb 20:48:36 ntpd[17862]: Listen normally on 2 lo 127.0.0.1:123
 6 Feb 20:48:36 ntpd[17862]: Listen normally on 3 eno1 192.168.100.187:123
 6 Feb 20:48:36 ntpd[17862]: Listen normally on 4 eno2 192.168.100.197:123
 6 Feb 20:48:36 ntpd[17862]: Listen normally on 5 eno3 192.168.100.186:123
 6 Feb 20:48:36 ntpd[17862]: Listen normally on 6 eno4 192.168.100.204:123
 6 Feb 20:48:36 ntpd[17862]: Listen normally on 7 lo [::1]:123
 6 Feb 20:48:36 ntpd[17862]: Listen normally on 8 eno1 [fe80::2e76:8aff:fe56:9f28%2]:123
 6 Feb 20:48:36 ntpd[17862]: Listen normally on 9 eno2 [fe80::2e76:8aff:fe56:9f29%3]:123
 6 Feb 20:48:36 ntpd[17862]: Listen normally on 10 eno3 [fe80::2e76:8aff:fe56:9f2a%4]:123
 6 Feb 20:48:36 ntpd[17862]: Listen normally on 11 eno4 [fe80::2e76:8aff:fe56:9f2b%5]:123
 6 Feb 20:48:36 ntpd[17862]: Listening on routing socket on fd #28 for interface updates
 6 Feb 20:48:52 ntpd[17862]: ntpd: time set +0.885456 s
livecd ~ #
Rootfs Install
Retrieve a Stage3 File from Nearby Mirror
Find a nearby mirror, and pick a stage3 file that suits your needs. The systemd stage3 file I picked below was my choice and may not be what you are looking for. The Gentoo Handbook has additional detail on how to select and retrieve a stage3 file.
livecd ~ # cd /mnt/gentoo
livecd /mnt/gentoo # wget http://www.gtlib.gatech.edu/pub/gentoo/releases/amd64/autobuilds/current-stage3-amd64-systemd/stage3-amd64-systemd-20210203T214504Z.tar.xz
--2021-02-06 21:03:56--  http://www.gtlib.gatech.edu/pub/gentoo/releases/amd64/autobuilds/current-stage3-amd64-systemd/stage3-amd64-systemd-20210203T214504Z.tar.xz
Resolving www.gtlib.gatech.edu... 128.61.111.9, 128.61.111.10, 128.61.111.7, ...
Connecting to www.gtlib.gatech.edu|128.61.111.9|:80... connected.
HTTP request sent, awaiting response... 200 OK
Length: 207225272 (198M) [application/x-xz]
Saving to: ‘stage3-amd64-systemd-20210203T214504Z.tar.xz’

stage3-amd64-systemd-20 100%[==============================>] 197.62M  5.19MB/s    in 44s

2021-02-06 21:04:46 (4.51 MB/s) - ‘stage3-amd64-systemd-20210203T214504Z.tar.xz’ saved [207225272/207225272]
Extract Stage3 File
If the tar command does not work, check the compression type of the file retrieved and adjust the decompression switch as appropriate.
livecd /mnt/gentoo # tar xvpf stage3-*.tar.xz --xattrs --numeric-owner
...
./bin/gzip
./bin/bzcat
./bin/bunzip2
./bin/bzip2
./bin/awk
./tmp/
./tmp/.keep
livecd /mnt/gentoo #
Remove Stage3 File After Extraction
No need to leave the stage3 file laying about after extraction as its relevance degrades as time passes, and likely there will be a new one for retrieval if required for some reason.
livecd /mnt/gentoo # rm stage3-*
rm: remove regular file 'stage3-amd64-systemd-20210203T214504Z.tar.xz'? y
livecd /mnt/gentoo #
Configure Compile Options
See the guidance from the Gentoo Handbook for mor information. I essentially went with the default recommendation as below. Use your favorite text editor to make any needful changes.
# Compiler Options
COMMON_FLAGS="-march=native -O2 -pipe"
CFLAGS="${COMMON_FLAGS}"
CXXFLAGS="${COMMON_FLAGS}"
FCFLAGS="${COMMON_FLAGS}"
FFLAGS="${COMMON_FLAGS}"

# Portage Directories
PORTDIR="/var/db/repos/gentoo"
DISTDIR="/var/cache/distfiles"
PKGDIR="/var/cache/binpkgs"

# Make Options
MAKEOPTS="-j13"

# This sets the language of build output to English.
# Please keep this setting intact when reporting bugs.
LC_MESSAGES=C
Set Mirrors in make.conf File
Pick a few nearby, or not, mirros from which updates will be retrieved and add them to portage’s make.conf file.
mirrorselect -i -o >> /mnt/gentoo/etc/portage/make.confChroot System
There are just a few more things to set up before we can chroot into the environment which will become the servers operating system environment.
Copy DNS information
Copy the, presumably, working DNS information from the live CD server environment into the environment being built.
cp /etc/resolv.conf /mnt/gentoo/etc/
livecd /mnt/gentoo #
Mount Needed Server File Systems
Like the DNS information, some of the server’s file systems created at boot of live CD environment need to be made available in the environment being built after chroot.
livecd /mnt/gentoo # mount --types proc  /proc   /mnt/gentoo/proc
livecd /mnt/gentoo # mount --rbind       /sys    /mnt/gentoo/sys
livecd /mnt/gentoo # mount --make-rslave         /mnt/gentoo/sys
livecd /mnt/gentoo # mount --rbind       /dev    /mnt/gentoo/dev
livecd /mnt/gentoo # mount --make-rslave         /mnt/gentoo/dev
Enter Chroot Environment
livecd /mnt/gentoo # chroot /mnt/gentoo /bin/bash
livecd / # source /etc/profile
livecd / # export PS1="(chroot) $PS1"
(chroot) livecd / #
Mount Boot Partition
We mounted the root file system and activated swap before entering the chroot environment. Now it is time to mount the boot partition, /dev/sda2.
livecd /mnt/gentoo # mount /dev/sda2 /boot/
livecd /mnt/gentoo #
Download and Install Portage Files
The nonexistent directory message in the output below is expected as the directory does not exist until the first time the command is run and the path is created.
(chroot) livecd / # emerge-webrsync
!!! Section 'gentoo' in repos.conf has location attribute set to nonexistent directory: '/var/db/repos/gentoo'
!!! Invalid Repository Location (not a dir): '/var/db/repos/gentoo'
Fetching most recent snapshot ...
Trying to retrieve 20210205 snapshot from http://www.gtlib.gatech.edu/pub/gentoo ...
Fetching file gentoo-20210205.tar.xz.md5sum ...
Fetching file gentoo-20210205.tar.xz.gpgsig ...
Fetching file gentoo-20210205.tar.xz ...
Checking digest ...
Getting snapshot timestamp ...
Syncing local tree ...

Number of files: 146,681 (reg: 120,175, dir: 26,506)
Number of created files: 146,680 (reg: 120,175, dir: 26,505)
Number of deleted files: 0
Number of regular files transferred: 120,175
Total file size: 208.35M bytes
Total transferred file size: 208.35M bytes
Literal data: 208.35M bytes
Matched data: 0 bytes
File list size: 3.29M
File list generation time: 0.001 seconds
File list transfer time: 0.000 seconds
Total bytes sent: 106.17M
Total bytes received: 2.40M

sent 106.17M bytes  received 2.40M bytes  8.04M bytes/sec
total size is 208.35M  speedup is 1.92
Cleaning up ...

 * IMPORTANT: 5 news items need reading for repository 'gentoo'.
 * Use eselect news read to view new items.

(chroot) livecd / #
Choose Desired Machine Profile
List, then select. What I select may not be right for you. More information on portage profiles.
(chroot) livecd / # eselect profile list
Available profile symlink targets:
  [1]   default/linux/amd64/17.1 (stable)
  [2]   default/linux/amd64/17.1/selinux (stable)
  [3]   default/linux/amd64/17.1/hardened (stable)
  [4]   default/linux/amd64/17.1/hardened/selinux (stable)
  [5]   default/linux/amd64/17.1/desktop (stable)
  [6]   default/linux/amd64/17.1/desktop/gnome (stable)
  [7]   default/linux/amd64/17.1/desktop/gnome/systemd (stable)
  [8]   default/linux/amd64/17.1/desktop/plasma (stable)
  [9]   default/linux/amd64/17.1/desktop/plasma/systemd (stable)
  [10]  default/linux/amd64/17.1/desktop/systemd (dev)
  [11]  default/linux/amd64/17.1/developer (stable)
  [12]  default/linux/amd64/17.1/no-multilib (stable)
  [13]  default/linux/amd64/17.1/no-multilib/hardened (stable)
  [14]  default/linux/amd64/17.1/no-multilib/hardened/selinux (stable)
  [15]  default/linux/amd64/17.1/systemd (stable) *
  [16]  default/linux/amd64/17.0 (dev)
  [17]  default/linux/amd64/17.0/selinux (dev)
  [18]  default/linux/amd64/17.0/hardened (dev)
  [19]  default/linux/amd64/17.0/hardened/selinux (dev)
  [20]  default/linux/amd64/17.0/desktop (dev)
  [21]  default/linux/amd64/17.0/desktop/gnome (dev)
  [22]  default/linux/amd64/17.0/desktop/gnome/systemd (dev)
  [23]  default/linux/amd64/17.0/desktop/plasma (dev)
  [24]  default/linux/amd64/17.0/desktop/plasma/systemd (dev)
  [25]  default/linux/amd64/17.0/developer (dev)
  [26]  default/linux/amd64/17.0/no-multilib (dev)
  [27]  default/linux/amd64/17.0/no-multilib/hardened (dev)
  [28]  default/linux/amd64/17.0/no-multilib/hardened/selinux (dev)
  [29]  default/linux/amd64/17.0/systemd (dev)
  [30]  default/linux/amd64/17.0/x32 (dev)
  [31]  default/linux/amd64/17.0/musl (exp)
  [32]  default/linux/amd64/17.0/musl/hardened (exp)
  [33]  default/linux/amd64/17.0/musl/hardened/selinux (exp)
  [34]  default/linux/amd64/17.0/uclibc (exp)
  [35]  default/linux/amd64/17.0/uclibc/hardened (exp)
(chroot) livecd / # eselect profile set 15
(chroot) livecd / #
Set Timezone
I am in the US Central timezone, so that is what I use.
(chroot) livecd / # echo US/Central > /etc/timezone
(chroot) livecd / # emerge --config sys-libs/timezone-data


Configuring pkg...

 * Updating /etc/localtime with /usr/share/zoneinfo/US/Central

(chroot) livecd / #
Configure and Set Locales
I have simple US locale needs, so en_US.UTF-8 UTF-8 are fine for me. Sadly, no vi available in chroot environment, so nano :<.
(chroot) livecd / # nano -w /etc/locale.gen
en_US.UTF-8 UTF-8
(chroot) livecd / # locale-gen
 * Generating 2 locales (this might take a while) with 24 jobs
 *  (2/2) Generating C.UTF-8 ...                                                         [ ok ]
 *  (1/2) Generating en_US.UTF-8 ...                                                     [ ok ]
 * Generation complete
 * Adding locales to archive ...                                                         [ ok ]
(chroot) livecd / #
(chroot) livecd / # eselect locale list
Available targets for the LANG variable:
  [1]   C
  [2]   C.utf8
  [3]   POSIX
  [4]   en_US.utf8
  [5]   C.UTF8 *
  [ ]   (free form)
(chroot) livecd / #
(chroot) livecd / # eselect locale set 4
Setting LANG to en_US.utf8 ...
Run ". /etc/profile" to update the variable in your shell.
(chroot) livecd / # . /etc/profile
livecd / # export PS1="(chroot) $PS1"
(chroot) livecd / #
Update Environment
Update to pick up new locale settings, then restore the chroot prompt to keep track of which environment I am working in.
(chroot) livecd / # env-update && source /etc/profile
>>> Regenerating /etc/ld.so.cache...
livecd / # export PS1="(chroot) $PS1"
(chroot) livecd / #
Configure fstab File
I am going to use UUIDs to specify my drive partitions, so I use the blkid command to list all the UUIDs, and then I select the ones I need to use, those for vg0-swap, vg0-root and /dev/sda2 (boot).
(chroot) livecd / # blkid
/dev/loop0: TYPE="squashfs"
/dev/sda1: UUID="b33c5f9e-32ed-4196-a52a-57756832f805" BLOCK_SIZE="512" TYPE="xfs" PARTLABEL="biosboot" PARTUUID="61cbd714-30b8-40ec-af50-d3204d75ba38"
/dev/sda2: LABEL="boot" UUID="5a8fc2bd-7a73-498d-bc38-97004e37bf5a" BLOCK_SIZE="1024" TYPE="ext4" PARTLABEL="boot" PARTUUID="d8d0a8fe-b6d2-4abe-a9f7-55924a23b36f"
/dev/sda3: UUID="94a30c4c-0c67-4847-ada5-6e68eb1d8c73" TYPE="crypto_LUKS" PARTLABEL="data-encrypted" PARTUUID="725ed3ec-e9a6-434b-8208-0dd3dc777fdf"
/dev/sdb1: BLOCK_SIZE="2048" UUID="2021-02-03-23-28-15-06" LABEL="Gentoo amd64 20210203T214504Z" TYPE="iso9660" PTUUID="6fe72143" PTTYPE="dos" PARTUUID="6fe72143-01"
/dev/sdb2: SEC_TYPE="msdos" LABEL_FATBOOT="GENTOOLIVE" LABEL="GENTOOLIVE" UUID="18EE-5E6B" BLOCK_SIZE="512" TYPE="vfat" PARTUUID="6fe72143-02"
/dev/mapper/lvm: UUID="a6GHS0-tQLr-nQsu-kGnJ-OgqL-a7bv-qJalFc" TYPE="LVM2_member"
/dev/mapper/vg0-swap: UUID="44755b46-c220-42f5-bfab-51709ca1e6b8" TYPE="swap"
/dev/mapper/vg0-root: LABEL="root" UUID="f90eca20-efcd-4cf2-ad2a-02d640a82362" BLOCK_SIZE="512" TYPE="xfs"
(chroot) livecd / #
So I have:
| Partition | UUID |
|---|---|
| /dev/sda2 | 5a8fc2bd-7a73-498d-bc38-97004e37bf5a |
| vg0-root | f90eca20-efcd-4cf2-ad2a-02d640a82362 |
| vg0-swap | 44755b46-c220-42f5-bfab-51709ca1e6b8 |
And the /etc/fstab file looks as below, when I finished being angry that nano is not vim.
nano -w /etc/fstab
UUID=5a8fc2bd-7a73-498d-bc38-97004e37bf5a       /boot   ext4    noauto,noatime  1 2
UUID=f90eca20-efcd-4cf2-ad2a-02d640a82362       /       xfs     noatime 0 1
UUID=44755b46-c220-42f5-bfab-51709ca1e6b8       none    swap    sw      0 0
Kernel Configure and Build
It’s time to start installing things, starting with the kernel sources, the genkernel tool, and the cryptsetup tools.
Kernel
The Portage package manager tool is emerge. It is similar too and different from package managers in other distributions, and will be used in the remainder of these notes to install additional software starting with kernel source.
(chroot) livecd / # emerge sys-kernel/gentoo-sources

 * IMPORTANT: 5 news items need reading for repository 'gentoo'.
 * Use eselect news read to view new items.

Calculating dependencies... done!

>>> Verifying ebuild manifests

>>> Emerging (1 of 4) dev-libs/elfutils-0.182::gentoo
 * Fetching files in the background.
 * To view fetch progress, run in another terminal:
 * tail -f /var/log/emerge-fetch.log
 * elfutils-0.182.tar.bz2 BLAKE2B SHA512 size ;-) ...                                   [ ok ]
...
>>> Auto-cleaning packages...

>>> No outdated packages were found on your system.

 * Regenerating GNU info directory index...
 * Processed 87 info files.

 * IMPORTANT: 5 news items need reading for repository 'gentoo'.
 * Use eselect news read to view new items.

(chroot) livecd / #
Genkernel
Genkernel is a utility which automates the kernel build steps and initramfs build. Sadly the install did not go as smoothly as it should have, and I am starting to think I should have read the news items.
It seems the default Gentoo licensing profile has become more restrictive. As a result the linux-firmware dependency pulled in by the genkernel build did not go immediately as expected. I don’t think this will be a problem. The below may be useful for when you find yourself in a similar situation where more than minimal interaction is needed to get a package installed.
(chroot) livecd / # emerge genkernel

 * IMPORTANT: 5 news items need reading for repository 'gentoo'.
 * Use eselect news read to view new items.

Calculating dependencies... done!
[ebuild  N     ] app-arch/cpio-2.12-r1  USE="nls"
[ebuild  N     ] sys-kernel/linux-firmware-20201218  USE="redistributable -initramfs -savedconfig (-unknown-license)"
[ebuild  N     ] sys-kernel/genkernel-4.1.2-r3  USE="firmware (-ibm)"

The following license changes are necessary to proceed:
 (see "package.license" in the portage(5) man page for more details)
# required by sys-kernel/genkernel-4.1.2-r3::gentoo[firmware]
# required by genkernel (argument)
=sys-kernel/linux-firmware-20201218 linux-fw-redistributable no-source-code

Use --autounmask-write to write changes to config files (honoring
CONFIG_PROTECT). Carefully examine the list of proposed changes,
paying special attention to mask or keyword changes that may expose
experimental or unstable packages.
(chroot) livecd / # etc
Let’s do as instructed and run the install command again with the –autounmask-write switch to prompt for and add the needed modifications.
(chroot) livecd / # emerge genkernel --autounmask-write

 * IMPORTANT: 5 news items need reading for repository 'gentoo'.
 * Use eselect news read to view new items.

Calculating dependencies... done!
[ebuild  N     ] app-arch/cpio-2.12-r1  USE="nls"
[ebuild  N     ] sys-kernel/linux-firmware-20201218  USE="redistributable -initramfs -savedconfig (-unknown-license)"
[ebuild  N     ] sys-kernel/genkernel-4.1.2-r3  USE="firmware (-ibm)"

The following license changes are necessary to proceed:
 (see "package.license" in the portage(5) man page for more details)
# required by sys-kernel/genkernel-4.1.2-r3::gentoo[firmware]
# required by genkernel (argument)
=sys-kernel/linux-firmware-20201218 linux-fw-redistributable no-source-code

Autounmask changes successfully written.

 * IMPORTANT: config file '/etc/portage/package.license' needs updating.
 * See the CONFIGURATION FILES and CONFIGURATION FILES UPDATE TOOLS
 * sections of the emerge man page to learn how to update config files.
(chroot) livecd / # etc
Changes have been added, but now we need to accept the modified configuration files. I believe etc-update is the only option until I get around to installing gentoolkit package. Let’s give it a try. I haven’t used etc-update in a while, but pressing 1 took me to a view of the proposed change, pressing q exited the view, and finally pressing 1 again replaced the original license file with the updated file.
(chroot) livecd / # etc-update
Scanning Configuration files...
The following is the list of files which need updating, each
configuration file is followed by a list of possible replacement files.
1) /etc/portage/package.license (1)
Please select a file to edit by entering the corresponding number.
              (don't use -3, -5, -7 or -9 if you're unsure what to do)
              (-1 to exit) (-3 to auto merge all files)
                           (-5 to auto-merge AND not use 'mv -i')
                           (-7 to discard all updates)
                           (-9 to discard all updates AND not use 'rm -i'): 1

File: /etc/portage/._cfg0000_package.license
1) Replace original with update
2) Delete update, keeping original as is
3) Interactively merge original with update
4) Show differences again
5) Save update as example config
Please select from the menu above (-1 to ignore this update): 1
Replacing /etc/portage/package.license with /etc/portage/._cfg0000_package.license

Exiting: Nothing left to do; exiting. :)
(chroot) livecd / #
At this point we are ready to run the install again, and this time it should work, and indeed does. The install ran successfully to completion.
(chroot) livecd / # emerge genkernel
...
>>> Auto-cleaning packages...

>>> No outdated packages were found on your system.

 * Regenerating GNU info directory index...
 * Processed 88 info files.

 * IMPORTANT: 6 news items need reading for repository 'gentoo'.
 * Use eselect news read to view new items.

(chroot) livecd / #
Cryptsetup Tools
These will be needed in the initramfs during boot to deal with decryption of the LUKS partition.
(chroot) livecd / # emerge sys-fs/cryptsetup

 * IMPORTANT: 6 news items need reading for repository 'gentoo'.
 * Use eselect news read to view new items.

Calculating dependencies... done!

>>> Verifying ebuild manifests

>>> Running pre-merge checks for sys-fs/cryptsetup-2.3.2
 * WARNING! WARNING! WARNING!
 * You have chosen LUKS2 as your default format.
 * This can break LUKS1 backwards compatibility.
 * Enable "luks1_default" USE flag if you need backwards compatibility.
...
>>> Auto-cleaning packages...

>>> No outdated packages were found on your system.

 * GNU info directory index is up-to-date.

 * IMPORTANT: 6 news items need reading for repository 'gentoo'.
 * Use eselect news read to view new items.

(chroot) livecd / #
Install Vim
Purely optional, but not for me as there are more files to edit, and I have had about all I want to do with nano for the day. An unfortunate side effect of learning to use vim is that I find myself angered when it is not available and I have to use something else. It is not that other editors are bad, just that I am always using vim instructions only to discover they do nothing but pollute the file I am editing.
(chroot) livecd / # emerge vim Configure Genkernel
(chroot) livecd / # cp -p /etc/genkernel.conf /etc/genkernel.conf.original
(chroot) livecd / # vim /etc/genkernel.conf
...
NCONFIG="yes"
...
LVM="yes"
...
LUKS="yes"
...
E2FSPROGS="yes"
...
XFSPROGS="yes"
Building the Kernel, at Last
As a short cut for coming up with a kernel configuration file, I am going to jumpstart things by simply copying the configuration of the kernel the live CD environment booted the system with. It is convenient, is known to produce a kernel that can actually boot the server and saves this post from becoming even longer than it is now.
I did make one change to the Gentoo specific features, changing the init system from OpenRC used in the Live CD environment to Systemd which I want to use in my finished server. Other than that I made no changes to the configuration I extracted from the booted kernel.
Once past the build process and when I have a server that boot successfully, I will revisit the configuration in detail removing unnecessary components, and adding anything needed which is missing.
(chroot) livecd / # zcat /proc/config.gz >>/usr/src/linux/.config
(chroot) livecd / # time genkernel --luks --lvm  all
...
* mount: >> Automatically unmounting boot partition from '/boot' as it was previously ...

* Do NOT report kernel bugs as genkernel bugs unless your bug
* is about the default genkernel configuration...
*
* Make sure you have the latest ~arch genkernel before reporting bugs.

real	31m47.639s
user	260m58.425s
sys	23m46.780s
(chroot) livecd / #
Install GRUB2
GRUB is the boot loader I am going to be using, so now is the time to install and configure it.
(chroot) livecd / # echo "sys-boot/grub:2 device-mapper" >> /etc/portage/package.use/sys-boot
(chroot) livecd / # emerge -av grub
...
>>> Auto-cleaning packages...

>>> No outdated packages were found on your system.

 * Regenerating GNU info directory index...
 * Processed 90 info files.

 * IMPORTANT: 6 news items need reading for repository 'gentoo'.
 * Use eselect news read to view new items.

(chroot) livecd / # grub-install /dev/sda
Installing for i386-pc platform.
  WARNING: Failed to connect to lvmetad. Falling back to device scanning.
  WARNING: Failed to connect to lvmetad. Falling back to device scanning.
  WARNING: Failed to connect to lvmetad. Falling back to device scanning.
Installation finished. No error reported.
(chroot) livecd / #
Configure GRUB
To configure GRUB to boot properly, I need to specify the UUID of LUKS partition, /dev/sda3 as well as the UUID of the LVM rootdrive vg0-root. As before, I turn to blkid command to identify UUID, but any other method will likely do fine.
(chroot) livecd /etc/default # blkid  | grep sda3
/dev/sda3: UUID="94a30c4c-0c67-4847-ada5-6e68eb1d8c73" TYPE="crypto_LUKS" PARTLABEL="data-encrypted" PARTUUID="725ed3ec-e9a6-434b-8208-0dd3dc777fdf"
(chroot) livecd /etc/default #
So, the LUKS partition UUID in this case is 94a30c4c-0c67-4847-ada5-6e68eb1d8c73. From earlier work setting up fstab, i have the UUID of the actual root partition, vg0-root, as f90eca20-efcd-4cf2-ad2a-02d640a82362. Now let’s Backup and edit /etc/default/grub config file as follows.
(chroot) livecd /etc/default # cp /etc/default/grub /etc/default/grub.original
(chroot) livecd /etc/default # vim /etc/default/grub

GRUB_CMDLINE_LINUX="init=/usr/lib/systemd/systemd dolvm crypt_root=UUID=94a30c4c-0c67-4847-ada5-6e68eb1d8c73 root=UUID=f90eca20-efcd-4cf2-ad2a-02d640a82362"
Build grub.cfg
In an ideal world, the following grub command should pick up the installed kernel, initramfs and create a boot loader entry capable of decrypting the LUKS partition to use the root and swap volumes within.
(chroot) livecd /etc/default #
(chroot) livecd / # grub-mkconfig -o /boot/grub/grub.cfg
Generating grub configuration file ...
  WARNING: Failed to connect to lvmetad. Falling back to device scanning.
  WARNING: Failed to connect to lvmetad. Falling back to device scanning.
  WARNING: Failed to connect to lvmetad. Falling back to device scanning.
  WARNING: Failed to connect to lvmetad. Falling back to device scanning.
  WARNING: Failed to connect to lvmetad. Falling back to device scanning.
  WARNING: Failed to connect to lvmetad. Falling back to device scanning.
  WARNING: Failed to connect to lvmetad. Falling back to device scanning.
  WARNING: Failed to connect to lvmetad. Falling back to device scanning.
  WARNING: Failed to connect to lvmetad. Falling back to device scanning.
  WARNING: Failed to connect to lvmetad. Falling back to device scanning.
  WARNING: Failed to connect to lvmetad. Falling back to device scanning.
  WARNING: Failed to connect to lvmetad. Falling back to device scanning.
Found linux image: /boot/vmlinuz-5.4.92-gentoo-x86_64
Found initrd image: /boot/initramfs-5.4.92-gentoo-x86_64.img
  WARNING: Failed to connect to lvmetad. Falling back to device scanning.
  WARNING: Failed to connect to lvmetad. Falling back to device scanning.
done

(chroot) livecd / #
Set Root Password
Set the password for the root account within the chroot environment before rebooting as below. This is also a good time to add non-root users to the system if you choose, I’ve opted to do that later after the server can boot on it’s own.
(chroot) livecd / # passwd

You can now choose the new password or passphrase.

A good password should be a mix of upper and lower case letters,
digits, and other characters.  You can use a password
that consists of 8 characters.

A passphrase should be of at least 3 words, 8 to 40 characters
long, and contain enough different characters.

Alternatively, if no one else can see your terminal now, you can
pick this as your password: "Update=prison_Claw".

Enter new password:
Re-type new password:
passwd: password updated successfully
(chroot) livecd / #
Reboot
Now is the point I need to reboot and see if I have a working server. My expectation is the server will boot after prompting for pass phrase to decrypt the LUKS partition.
Exit Chroot
First I need to exit and close the chroot environment.
(chroot) livecd ~ # exit
exit
livecd /mnt/gentoo # cd
livecd ~ #
Unmount File Systems and Reboot
Finally it is time to unmount the file systems and reboot.
livecd /mnt/gentoo # cd
livecd ~ # umount -l /mnt/gentoo/dev{/shm,/pts,}
livecd ~ # umount -R /mnt/gentoo
livecd ~ # reboot
livecd ~ #
Broadcast message from root@livecd (pts/0) (Sun Feb  7 12:54:14 2021):

The system is going down for reboot NOW!
Connection to 192.168.100.187 closed by remote host.
$
Troubleshooting
Hopefully none of this is needed, but just in case here are some notes about going about fixing things if the server does not boot as expected. It essentially comes down to understanding what went wrong and then reentering the chroot environment after booting from USB to fix the issue.
- Boot system from ISO
- Open LUKS parttition
- Mount vg0-root on __/mnt/gentoo
- Enter chroot environment
- Mount boot drive
- Fix what is broken
- Reboot
- Repeat as needed
Conclusion
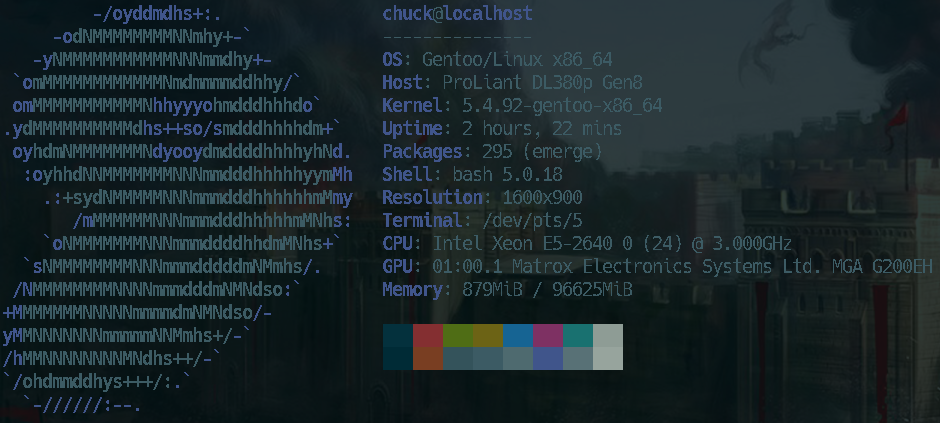
As you may have inferred from the screenshot at the top of the post and the lack of detailed troubleshooting information, server booted up fine. I was able to login on the console as root and begin the working on setting up systemd services and other software needed to make this into the KVM host it one day will be.
It is probably worth mentioning that the system built following the steps above will come up without network connectivity or ssh running. So you will need to be comfortable configuring a NIC using ip or ifconfig and route. If you plan on using DHCP to provide network addresses, you should consider emerging a DHCP client package before rebooting.
Finally, as should be clear if you read the far, the server is using systemd for its init system. If that is not what you want, then these are not the instructions you should be looking at.
While I have used Gentoo as my primary operating system for many years now, it’s been many years since I have had the opportunity to run through a fresh install. Rolling releases keep on working if you keep on updating and the only reason to start from scratch is when you have new hardware. It was a long process to document the steps, but it is nice to have current notes to replace my seven year old notes.
As always, many of my notes and steps I followed were inspired by the work of others who have been kind enough to share their experience on the web. I encourage review of the sources listed in the reference section, especially guidance from the Gentoo Handbook when unsure of what really should be done.
References

Chrls is currently a technology transformation leader at one of the oldest American investment banking services holding companies, headquartered in New York City. Previous roles at current employer include project manager, front office support, retail and enterprise global Windows server support. Currently residing in Tennessee on the Cumberland Plateau and enjoying life, family and open source.
Mastodon FunkwhaleComments
You can use a Mastodon accounti to comment on this article by replying to the associated Mastodon toot.